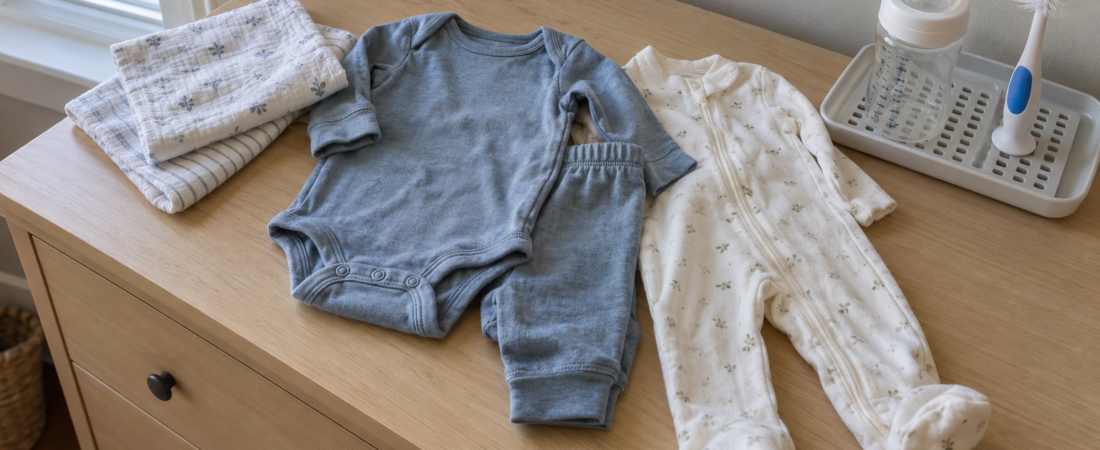
Building a baby registry for first-time moms can feel overwhelming when every video comes with another shopping list. There is always another must-have or upgrade, often with an affiliate link to something you supposedly cannot manage without.
Some recommendations are useful. But seeing so many products can make a first-time mom feel that a smaller budget means she is already falling behind.
I did not have the budget for every luxury item when I prepared for Henry. What I learned is that simple can work very well. I wanted a few good things that served a purpose: a diaper cream that worked for him, a gentle shampoo, wipes that suited his skin, and feeding supplies I could clean properly. I did not need a premium formula-making machine to be ready to care for my baby.
For me, a simpler baby registry meant choosing carefully: safe, suitable products, manageable quantities, and room to buy more when a need became clear. A high price or a long list of features does not tell you how useful something will be in your home.
If social media has made you question whether you are doing enough, I wrote more about that pressure in Instagram Is Poison for First-Time Moms: What I Wish I Knew.
What Actually Helped When Henry Arrived
Even with a fairly practical approach, some things barely got used. Henry’s hats and mittens were mostly left aside. The carrier saw little use. The pacifier worked briefly at the hospital, then he wanted nothing to do with it.
Other purchases earned their place: the bathtub with a stand, my electric breast pump, absorbent cloths, a bottle brush, and a little yellow night-light for nighttime feeds and diaper changes.
Prepare for your baby, but don’t try to predict your baby.
This guide combines what I actually had with the starting list I would suggest today. Quantities are practical estimates, not rules. Your climate, laundry routine, baby’s size, and feeding plan will change what you need.
Baby Registry Essentials: Choose a Few Good Basics
You do not need several brands of every care product or the most advanced version of every appliance. For everyday care products such as wipes, shampoo, and diaper cream, start with one suitable option, see how it works, and add or replace it when there is a reason. Quality here means suitability, safety, durability, and ease of cleaning—not a luxury label.
Start with five everyday needs: a safe place to sleep, appropriate clothing, diaper changes, feeding, and basic hygiene. Add safe transportation if your baby will travel by car.
Then ask yourself:
- Can I wash clothes every two or three days, or only once a week?
- Will the house be warm, cool, or air-conditioned?
- Is this item needed from day one, or can I order it later?
- Do I have room to store it?
- Does it solve a problem I expect to have, or am I buying it because every checklist includes it?
Keep a short “buy later” list on your phone. You can prepare without paying for every possible situation in advance.
Baby Registry Clothing: My Real Quantities and a Starting List
For Henry, I had about seven sets with a long-sleeve bodysuit and matching pants, seven extra short-sleeve bodysuits, seven additional pull-on pants, seven warmer sleepers, and eight pairs of socks. I also had sleeveless tops and shorts for hot days. During the newborn stage, I usually dressed him in more coverage, adjusting his clothes to the temperature. I had two hat-and-mitten sets, too, but he barely used them.
Altogether, that gave me around 14 bodysuits: seven long-sleeve and seven short-sleeve. The separate pieces made it easier to put together a clean outfit and adjust his clothing to the weather and indoor temperature.
Choosing colors that worked well together meant I could mix and match the bodysuits and pants without needing a specific matching set for every outfit.
These clothing quantities stayed manageable because I could do laundry more than once a week. If you wash less often, you may need a few more everyday outfits to avoid running out of clean clothes between loads.
Most of my clothing purchases were in the next sizes up rather than a large newborn wardrobe. Some clothes were a little big at first, but we used them for a long time. Check each brand’s height and weight chart rather than relying only on the age on the label, and make sure sleepwear fits properly.
How Many Clothes Would I Start With?
The following is my suggested starting range if you can do laundry every two or three days. These are alternatives you can combine, not a requirement to buy the maximum in every row.
| Item | Suggested starting quantity | How to adjust |
|---|---|---|
| Bodysuits | 10–14 total | Divide short and long sleeves according to your climate and indoor temperature. |
| Footed sleepers or one-piece pajamas | 7–10 | Choose fabric weight for your home; they do not all need to be thick or warm. |
| Pull-on pants | 5–7 | You may need fewer if your baby mostly wears one-piece outfits. |
| Socks | 4–8 pairs | Footed sleepers reduce the need for separate socks. |
| Special outfits | 1–2, if wanted | Everyday changes matter more than a collection of dressy clothes. |
| Outdoor hat | 1 appropriate to the season, if needed | A hat for going outside is different from an indoor sleep accessory. |
If you wash weekly, add several everyday outfits and burp cloths. If you wash daily, start toward the lower end. Buy more when you see which pieces you reach for.
Keep a small selection that fits at birth rather than skipping newborn sizes completely. A bigger baby may move on quickly; a smaller baby may need them longer. Sleepwear and swaddles should fit correctly, even when you are buying ahead.
Diapers: Don’t Stock Up Before You Know the Fit
I used one full pack of newborn diapers, opened a second, and soon moved Henry into the next size. That experience is why I would avoid buying a huge newborn supply.
Start with one or two small packs, then reassess. Package sizes vary, so look at the diaper count rather than treating “two packs” as a fixed number.
Check the size range, fit around the waist and legs, and how the baby’s skin responds. A brand that works for someone else’s baby may not work for yours. Persistent irritation deserves a conversation with the pediatrician rather than repeated brand changes alone.
For changes, I used wipes and diaper-rash ointment. You do not need the same brands I used. Start with a small supply instead of multiple unopened boxes of one product.
Changing Supplies Where You Actually Need Them
I had three changing pads in different places around the house. It was practical for us, but one washable or wipeable pad is a reasonable starting point.
Keep diapers, wipes, a spare outfit, and your chosen barrier cream together. A small basket can do the job. For a raised changing surface, stay with your baby and keep a hand on them; a pad or strap does not replace supervision.
I did not buy a dedicated diaper pail, although I would consider one for convenience. It belongs in the optional category: you can use your existing trash routine and decide later whether odor control is worth another purchase. A laundry hamper was useful, too.
Bath Time: The Stand Was Worth It for Me
My bathtub had a stand, and my back appreciated it. That is one purchase I would make again, provided the tub and stand are designed to work together and used according to their instructions. Choose a setup that suits your space and lets you support the baby comfortably.
We had three towels. Although I bought a hooded towel, I eventually preferred a soft regular children’s towel because the size worked better for us. The hood itself was not something I needed to pay extra for.
My simple bath list would be:
- One suitable infant tub or bathing setup.
- Two or three soft towels.
- A few soft washcloths.
- One gentle baby cleanser or shampoo.
- A soft baby hairbrush, if wanted.
I did not use moisturizer or buy a bath thermometer. Skin needs vary, so you can decide whether to add moisturizer based on your baby’s needs and pediatrician’s advice.
For bathing, the American Academy of Pediatrics recommends warm, not hot, water and checking it with your wrist or elbow. Keep supplies within reach and maintain hands-on supervision. Never leave the baby alone in the bath, even briefly. Follow newborn sponge-bath guidance until the cord area has healed.
Sleep: Less Bedding, More Attention to the Sleep Space
Henry’s portable crib stayed beside our bed, in his own sleep space. When choosing a sleep space, look for a crib, bassinet, or play yard that meets applicable safety standards and is intended for infant sleep. Use the mattress or pad specified by the manufacturer; do not add an extra mattress to a play yard.
I had around four comforters, four loose top sheets, eight sheets for covering the mattress, and nine thicker blankets I used for swaddling. I would not turn those quantities into a shopping recommendation today. Pillows were not used, and pillowcases had no practical purpose for us.
My smaller sleep list would be one suitable sleep space and three or four correctly fitted sheets. If you plan to swaddle, a small rotation of two or three suitable lightweight swaddles is a more restrained starting point than nine thick blankets. Add more only if your laundry routine requires it.
CDC guidance calls for babies to sleep on their backs on a firm, flat surface, with a fitted sheet and no soft bedding or loose objects. Keep the separate sleep space in your room, ideally for at least the first six months. Comforters, pillows, loose sheets, bumpers, and blanket-made nests do not belong in that space.
If you swaddle, use lightweight material, allow the hips to move, and always place the baby on their back. Stop as soon as they show signs of trying to roll. Avoid weighted swaddles and weighted sleep products. A properly fitted, nonweighted sleep sack that allows free movement can be an alternative to loose blankets.
For the experience behind our nighttime routine, you can also read what I learned about baby sleep and the pressure to find a perfect routine.
Optional Baby Registry Items for the Room
I used a plug-in star-shaped light with a soft yellow glow for nighttime feeds and changes. A simple dim light can be enough; it does not need to be a specialized nursery product.
Our room had air-conditioning and blackout curtains. Those were part of making our particular room comfortable, not universal registry requirements.
A baby monitor is high on my personal recommendation list, especially if you will spend time in another room. I would choose according to the house layout rather than automatically buying the most expensive model. I did not buy a white-noise machine, but it is an optional item I would consider.
Neither gadget replaces a safe sleep setup. The AAP advises against using home heart-rate or breathing monitors as a way to prevent SIDS.
Feeding: Leave Room for Your Plan to Change
Before Henry arrived, I expected to produce plenty of breast milk, but my supply was lower than I had imagined. My electric pump and milk-storage supplies were very useful.
That is why I would plan the feeding section of a baby registry before birth without buying a huge collection. Some parents need a pump immediately; others need one later or use hand expression. My experience makes me appreciate mine, but it does not make an electric pump essential for every family.
I had two nursing bras and did not buy a nursing pillow. I did not miss the pillow. Start with comfortable basics and add specialized items when there is a clear reason for them.
Bottles, Brushes, and a Place to Dry Them
I bought an Avent bottle kit with different sizes, and it was enough for us. A bottle brush was essential in my daily routine—I even took it with me when we traveled. I liked the quality of my Avent brush and used it to clean the bottles thoroughly. The bottles had a dedicated place in the kitchen. We managed without an electric sterilizer.
The brush is one of the simple items I would prioritize when planning to use bottles. The brand is my personal experience; choose a brush that works with your bottles and can be cleaned properly.
For occasional bottle use, two or three bottles can be a starting point. For regular bottle feeding, four to six may make the washing routine easier. These are shopping estimates: feeding frequency and how often you wash matter more than a perfect number. Try a small selection before committing to a large matching set.
Not buying a sterilizer does not mean skipping cleaning or sanitizing. CDC guidance calls for cleaning feeding items after use and daily sanitizing for babies under two months, premature babies, or babies with weakened immune systems. Depending on the manufacturer’s instructions, boiling or a suitable dishwasher cycle can provide sanitizing without a separate appliance. Let parts air-dry fully before storing them.
Breast Milk Storage: Containers and Handling
I used storage bags and glass containers for expressed milk. Choose bags made for breast milk or clean, food-grade containers with tight-fitting lids, and learn storage rules before building a freezer supply.
For freshly expressed milk, CDC lists up to four hours at room temperature of 77°F or below, up to four days refrigerated, and about six months in the freezer as best, with up to 12 months acceptable. Label containers with the expression date. Milk thawed in the refrigerator should be used within 24 hours of becoming fully thawed and should not be refrozen.
I warmed expressed milk in a warm-water bath rather than buying a bottle warmer. Milk does not have to be served warm; if you warm it, use warm water rather than a microwave or direct stovetop heat. The CDC breast milk storage guidance listed below explains the different time limits after warming and feeding.
Formula Preparation: What to Learn Before Birth
For formula, I warmed the water before adding the powder. That describes my routine; it is not a universal preparation method for newborns. Follow the product instructions and CDC precautions, measure water before powder, and use the exact ratio. Powdered formula is not sterile. For babies under two months, premature babies, or those with weakened immune systems, CDC advises boiling water and waiting about five minutes before mixing, then cooling the prepared formula before feeding. Simply making water lukewarm does not provide that precaution.
The Pacifier Was a Wait-and-See Item
Henry accepted a pacifier briefly at the hospital, then lost interest. I would buy one or two rather than a drawerful. Some babies simply do not want one. If breastfeeding, the AAP recommends waiting until breastfeeding is established before offering it for sleep.
Burp Cloths: Simple Things I Reached For
I had ten larger cotton cloths and six smaller soft cloths for wiping his mouth. The larger ones were useful over my shoulder during burping and for protecting clothes.
As a practical starting range, I would suggest eight to twelve absorbent burp cloths and four to six smaller soft cloths, adjusting after you see how quickly they go into the laundry. Washable cotton cloths do not need an expensive baby-specific label to be useful.
Keep a few near the feeding spot and some in your diaper bag. These are the kinds of inexpensive extras I would prioritize over another decorative outfit.
Baby Registry Items for Going Out
We had a stroller and an infant car seat. I would prepare safe car transportation before a planned car trip, including the trip home from the hospital.
Choose a rear-facing seat that fits your newborn and vehicle. Follow both manuals for installation and harness fit. NHTSA recommends keeping children rear-facing until they reach the manufacturer’s rear-facing height or weight limit.
A stroller can be useful, but the best choice depends on storage space, stairs, sidewalks, and how you will travel. Check that its configuration is appropriate for a newborn.
I also had a carrier, but barely used it. That would go on my “consider later” list rather than my automatic must-have list.
I bought a matching baby suitcase and backpack and took both to the hospital. For my own things, I used a rolling carry-on suitcase. I would have the baby’s bags ready before birth, whether you choose a matching set or use a suitable bag you already own. Look for enough room for diapers, spare clothes, burp cloths, a changing pad, and feeding supplies.
Basic Care: A Small Kit, Not a Medicine Cabinet
Our basic care kit included a thermometer, baby nail scissors, a brush, and nasal-care supplies. For Henry’s nails, I preferred baby scissors.
I did not buy a collection of medicines in advance. Medicines and supplements came after professional guidance. I would keep the starter kit simple and ask the pediatrician which thermometer method and nasal-care products or techniques are appropriate for a newborn. A syringe used for nasal irrigation is not the same as a gentle suction device, so I would not copy a technique from a shopping list.
My original supplies also included 70% alcohol, gauze, cotton, and cotton swabs. I would not include all of those as routine newborn necessities. The AAP recommends keeping the umbilical stump clean and dry and says routine alcohol is unnecessary. Follow your baby’s discharge instructions.
Baby Registry Furniture: One Dresser Was Enough for Us
I bought one dresser with six drawers. It held what we needed without a separate wardrobe or an elaborate nursery setup. I did not buy a nursing chair.
Before buying furniture, assign space for clothes, diapers, feeding supplies, and laundry in what you already own. A chair may be helpful if you lack a comfortable feeding spot, but a matching nursery collection is not a requirement.
The Hospital Bag: Check Your Hospital’s List First
For Henry, I packed about six clothing changes, five swaddling cloths, hygiene supplies, and a towel. That was what I packed for my stay; your hospital’s supplies and policies may be different.
Hospitals differ in what they provide and allow. Mine had restrictions on what I could bring, so I would ask before packing linens, toiletries, diapers, or feeding equipment.
For a starting plan, set aside:
- A going-home outfit and a few spare baby clothes, adjusted to the expected stay.
- A properly installed car seat for the journey home by car.
- Your identification, insurance information, and requested paperwork.
- A phone charger, comfortable clothing, slippers, and toiletries.
- Baby care items according to your hospital’s packing guidance.
Pack for the expected length of stay, with a little flexibility. You do not need to pack the entire nursery.
Remember Your Own Postpartum Basics
For myself, I bought comfortable underwear and pajamas, pads, slippers, and everyday toiletries. I used pads rather than disposable postpartum underwear. Two nursing bras were part of my supplies, too.
Choose pajamas or tops that are comfortable and allow easy feeding access if you plan to nurse. Add anything your maternity team recommends for your recovery. Your needs after birth belong on the preparation list alongside the baby’s.
Baby Registry for First-Time Moms: My Practical Checklist
Use this as a decision guide. “Must have” means a basic function to arrange; it does not always mean buying a new product.
Essentials to Arrange Before Birth
| Priority | What I would put here | Starting point |
|---|---|---|
| Must have | Suitable infant sleep space | One, with its specified mattress or pad. |
| Must have | Correctly fitted sheets | 3–4; adjust for laundry. |
| Must have | Everyday clothes | A flexible mix of bodysuits, sleepers, and pants; use the clothing table above and adjust for laundry and climate. |
| Must have | Diapers, wipes, and diaper-rash cream | 1–2 small diaper packs initially, a modest supply of suitable wipes, and one barrier cream. |
| Must have | A safe changing arrangement | One pad can be enough; duplicates are for convenience. |
| Must have | Bathing and drying supplies | One appropriate setup, 2–3 towels, and a few washcloths. |
| Must have | Feeding arrangements | Supplies suited to breastfeeding, expressed milk, formula, or a combination. |
| Buy before baby if using bottles | Bottle brush and a clean drying area | One suitable brush; arrange a way to clean, sanitize, and fully air-dry feeding parts. |
| Must have for car travel | Rear-facing car seat | One appropriate seat, installed before the first trip. |
| Must have | Basic care and mother’s recovery supplies | Thermometer, nail-care tool, comfortable clothes, and clinician-directed supplies. |
Useful Extras and Items That Can Wait
| Priority | What I would put here | Starting point |
|---|---|---|
| Useful extra | Burp cloths and smaller cloths | 8–12 larger cloths and 4–6 smaller ones to start. |
| Nice to have | Dim night-light, hamper, diaper pail, extra changing pad | Choose according to your home and routine. |
| Nice to have | Monitor, stroller, or supportive bath setup | Consider layout, travel, comfort, and budget. |
| Plan according to feeding needs | Pump, milk-storage supplies, bottles, nursing bras | My pump was very useful; needs differ between families. |
| Wait and see | Carrier, extra pacifiers, more diapers of one brand | Try a small supply first. |
| Wait and see | Bottle warmer, separate sterilizer, nursing pillow, sound machine, formula-making machine | Consider when you know which problem you want to solve. |
| Buy before baby | Diaper bag or another suitable bag | I bought a matching set and took both to the hospital. A bag you already own can work, too. |
| I would skip initially | Extra nursery furniture | One dresser was enough for us. |
| I would buy sparingly | Hooded towels, mittens, hats, newborn clothes | Useful in some circumstances, but easy to overbuy. |
| Skip for infant sleep | Pillows, comforters, loose top sheets, bumpers, blanket nests, weighted sleep products | Keep soft items and loose bedding out of the sleep space. |
What I Would Keep on My Baby Registry
I would buy the practical things that supported our routine again: the bath stand that made bathing more comfortable, the electric pump and storage supplies I used, absorbent cloths, my bottle brush, easy everyday clothes, and the small night-light.
I would buy fewer bedding items and fewer little accessories before knowing Henry’s preferences. The carrier, hooded towel, hats, and mittens would get a much smaller share of my attention and budget.
You may discover a different list. The useful question is not whether another mother loved something. It is whether it helps you care for your baby in your home.
You don’t need much to welcome the greatest gift of your life.
A safe place to sleep, a workable feeding plan, clean clothes, diaper supplies, and a few tools for daily care are a strong beginning. With a limited budget, I would put the essentials first and choose fewer suitable items rather than stretch myself to buy every optional product. Build your baby registry around a few suitable basics, use what you already have where it works, and leave the luxury extras for later—or leave them out altogether. You can add the rest as you learn together.
What baby item did you use constantly—and which one stayed in the drawer? I would love to hear your experience in the comments.
Sources & Further Reading
CDC: Providing Care for Babies to Sleep Safely
CDC: Cleaning and Sanitizing Feeding Items
CDC: Breast Milk Storage and Preparation
Leave a Reply